Import Content
You can import your existing content from Medium, Ghost, WordPress, Substack, or Beehiiv. The process is straightforward: export from your current platform, upload the file here.
Import from Medium
1. Export your content
Go to your Medium settings, navigate to Security and apps, scroll to Download your information, and click Download zip.
2. Upload
Once you've cleaned the zip, upload it. That's it.
Import from Ghost
1. Export your content
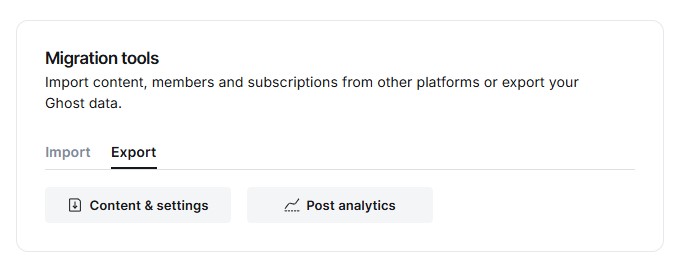
In your Ghost admin, go to Settings → Labs, then click Export to download a JSON file with all your content.
2. Enter your Ghost site URL
We need your Ghost site URL to properly import images. Enter something like https://yourblog.ghost.io
3. Upload
Select the JSON file and upload it.
Import from WordPress
1. Export your content
In WordPress, open Export, select All content, and click Download Export File. You'll get an XML file.
2. Upload
Upload the XML file. Done.
Import from Substack
1. Export your content
Go to substack.com, open Settings → Exports, and click Create new export. Substack will send you an email with a download link, follow it to get a ZIP archive.
2. Upload
Upload the ZIP directly. No source URL required.
What's included: Posts exported as HTML files, with a CSV index. Podcasts are automatically skipped. Posts without a title get one generated from their slug.
Embeds: YouTube and Vimeo embeds are imported as native embeds. Twitter/X and Spotify links are preserved as clickable links. SoundCloud links point to the artist page.
Tags: Substack does not export tags, so posts will be imported without tags.
Import from Beehiiv
1. Export your content
In your Beehiiv dashboard, go to Settings → Export Data, then select Export Posts and download the CSV file.
2. Upload
Upload the CSV file. That's it.
What gets imported
- Posts and pages
- Images (we download and host them if you have the feature enabled)
- Basic formatting (titles, paragraphs, lists, links)
- Publication dates
- Tags and categories (merged as tags)
- Cover images
What doesn't get imported
- Comments
- Custom styling beyond basic formatting
- Plugins or widgets
- User accounts (if you had multiple authors)
Advanced Options
When importing, you can configure a few advanced settings:

If duplicate slug
- Skip duplicate: If a post with the same slug already exists, it will be ignored
- Import with unique slug: Creates a new post with a modified slug (not yet implemented)
- Override existing content: Updates the existing post with the new content, images, and tags. Use this to re-import and sync your content.
Default status
- Import all: Imports both published posts and drafts
- Exclude draft: Only imports published posts, skips drafts
Create redirects
Off by default. When enabled, every imported post gets a redirect from the URL it had on your old
platform to its new URL on Writizzy. A WordPress post published at /2014/03/20/my-post/ keeps
working and lands on /my-post.
This only pays off if readers reach your Writizzy blog through the old URLs, which in practice
means you are pointing your custom domain here. If your old posts stay online at
medium.com/@you/... or yourblog.wordpress.com, those URLs are served by the other platform and
no redirect on our side can catch them.
The option is available for Medium and WordPress. Substack and Beehiiv posts already resolve,
since we serve /p/your-slug too, and Ghost URLs are unchanged.
You can review, edit and delete every redirect afterwards in Settings → Redirects.
After import, check your posts. Some formatting might need adjustments depending on how your previous platform handled things.