Multi-channel distribution
Connect your accounts once. When you publish, Writizzy handles the posting.
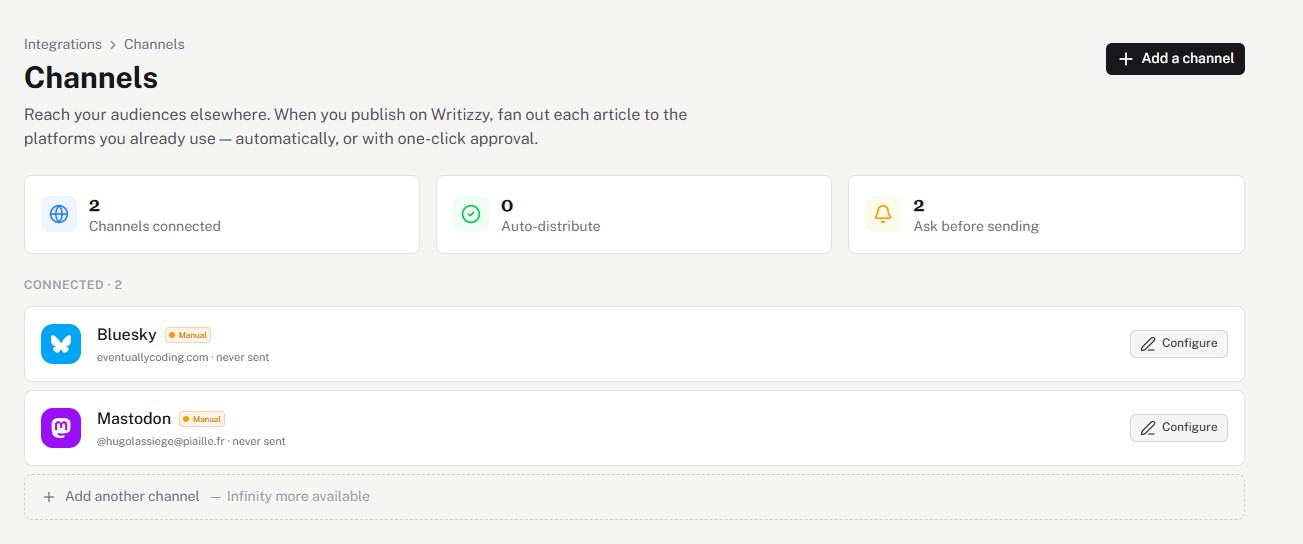
Setting up channels
Go to Settings > Integrations > Channels, then click + Add a channel.
Six channels are available:
Mastodon — Works with any instance. Enter your instance URL, click "Authorize", and Writizzy opens the authorization page in a new tab. It requests write access to statuses only.
Bluesky — Requires an app password, not your main account password. Create one under Bluesky's Settings > Privacy and Security > App Passwords, then enter your handle and the generated password. Bluesky does more than the other channels: connecting it also publishes your articles to the open network behind Bluesky, so they appear as real articles in other apps and the replies come back under your post. See Publishing to the open network.
Discord — Uses an incoming webhook URL. Create one in your server under Server Settings > Integrations > Webhooks, paste the URL, and Writizzy verifies it immediately.
LinkedIn — Posts to your personal profile. Click "Sign in with LinkedIn", approve the request in the new tab, and Writizzy can share on your behalf. The authorization lasts about 60 days, after which you reconnect in one click.
dev.to — Republishes your full article, not just a link. Paste a DEV API key (create one under dev.to Settings > Extensions), and each published article is posted to dev.to with a canonical link back to your blog, so the original keeps its SEO. You can optionally publish under a dev.to organization. Members-only posts are never republished.
Webhook — Connect anything. Instead of posting to a social network, Writizzy sends an HTTP POST with a JSON payload to any HTTPS URL you provide. Use it to wire your blog into Zapier, Make, n8n, or your own endpoint. Paste the URL, optionally add a signing secret, and Writizzy verifies it by sending a test payload. See Webhook payloads below for the details.
The number of channels you can connect may vary depending on your plan.
Sending modes
Each social channel runs in one of two modes:
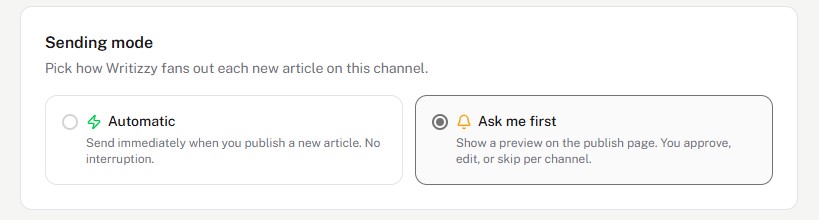
Automatic posts the moment your article goes live. No interruption.
Ask me first shows you a draft in the publish modal before anything goes out. You can read it, edit it, or skip it per article.
Discord and the generic Webhook channel are always automatic — they don't have an approval step.
Post message
For Mastodon, Bluesky, and LinkedIn, Writizzy generates an announcement message from your article's content.
dev.to works differently: it republishes the full article rather than an announcement, so there is no message or tone to configure. It still supports both sending modes, so you can keep it automatic or confirm each article first.
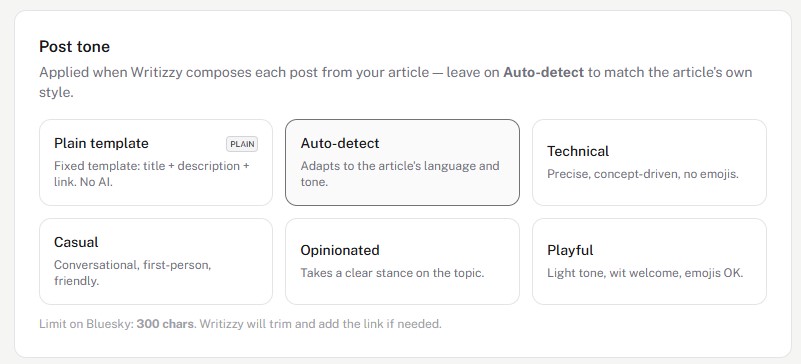
Plain template always uses the same format: title, description, and link. No generation involved.
The other options — Auto-detect, Technical, Casual, Opinionated, Playful — produce a message automatically matched to the style you choose. The configuration page shows a live preview generated from your latest draft, so you know what to expect before saving.
Available options may vary depending on your plan.
At publish time
If any channel is set to "Ask me first", the publish modal shows a Cross-Post section. Each pending channel displays its generated draft and a character counter.
You can leave a draft as-is, edit it inline, or skip the channel for this article. Channels on Automatic appear at the bottom as a summary row — they post in the background.
Skipped channels aren't gone. You can send them manually after publishing.
Tracking distribution after publishing
Open Post settings from the post list and go to the Publishing tab.
The Channels section shows what happened: Sent (with a timestamp), Skipped, Failed, or Pending. Anything not yet sent has a Send button. For Mastodon, Bluesky, and LinkedIn, clicking it opens an inline editor so you can review the draft first. Discord, dev.to, and Webhook send directly.
Failed posts show the reason. The Retry button works the same way as Send.
Webhook payloads
Unlike the social channels, the Webhook channel doesn't generate an announcement message. Each time you publish, Writizzy sends an HTTP POST with a JSON body to your endpoint:
{
  "event": "post.published",
  "test": false,
  "timestamp": "2026-01-01T10:00:00Z",
  "blog": { "name": "Your blog", "url": "https://your-blog.writizzy.blog" },
  "post": {
    "id": "a1b2c3…",
    "title": "Your latest article",
    "url": "https://your-blog.writizzy.blog/p/your-article",
    "excerpt": "The opening lines of your article…",
    "coverImage": "https://…/cover.jpg",
    "tags": ["tag-1", "tag-2"],
    "author": "You",
    "publishedAt": "2026-01-01",
    "membersOnly": false
  },
  "message": "📄 New on the blog — **Your latest article**\nhttps://your-blog.writizzy.blog/p/your-article"
}
The configuration page shows a live preview of this payload built from your latest published article, so you know exactly which fields you can map in Zapier, Make, or n8n. Members-only posts are sent without their excerpt.
When you connect the channel, Writizzy first sends a test payload ("test": true) to confirm the endpoint is reachable.
Verifying requests — if you set a signing secret, every request carries an X-Writizzy-Signature: sha256=… header, an HMAC-SHA256 of the raw body keyed with your secret. Recompute it on your side and compare to confirm the request genuinely came from Writizzy. The endpoint must be HTTPS and publicly reachable.